Community Articles
Find and share helpful community-sourced technical articles.
Turn on suggestions
Auto-suggest helps you quickly narrow down your search results by suggesting possible matches as you type.
Announcements
Now Live: Explore expert insights and technical deep dives on the new Cloudera Community Blogs — Read the Announcement
- Cloudera Community
- Support
- Community Articles
- Using VS Code for Remote Editing and Debugging on...
Options
- Subscribe to RSS Feed
- Mark as New
- Mark as Read
- Bookmark
- Subscribe
- Printer Friendly Page
- Report Inappropriate Content
Options
- Subscribe to RSS Feed
- Mark as New
- Mark as Read
- Bookmark
- Subscribe
- Printer Friendly Page
- Report Inappropriate Content
Contributor
Created on 11-13-2019 01:11 AM - edited 08-07-2020 12:50 AM
A few years ago I switched to using VS Code as my main code / text editor. I find it meets all my personal code development needs. With the release of the new BYOE functionality in CDSW 1.6 and CML, you can now use VS Code to remotely edit (and debug) Python, R and probably Scala code too. Plus you can also run and edit Jupyter Notebooks, all inside VS Code. This is a quick how-to to get it working.
Getting Connected
To start, you need to set up the Remote Editing feature for your CDSW/CML cluster. You must download the CLI client and add an SSH public key.
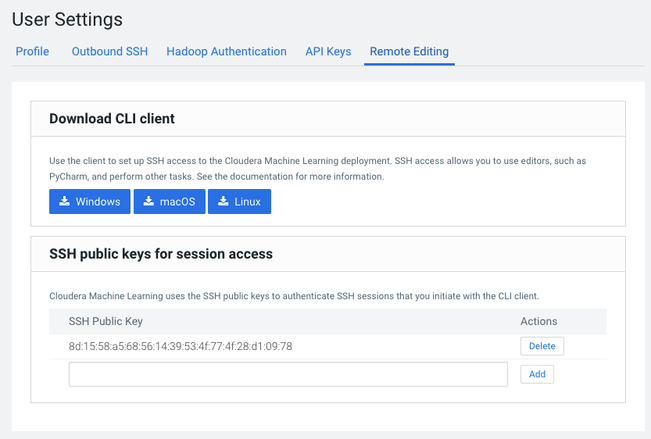
The next step is to authenticate and connect to the CDSW server using the CLI client from your local machine.
One you are connected, you should see something like this:
$ cdswctl ssh-endpoint -p ml-at-scale -m 4 -c 2
Forwarding local port 7847 to port 2222 on session bhsb7k4eqmonap62 in project jfletcher/ml-at-scale.
You can SSH to the session using

    ssh -p 7847 cdsw@localhost
Now you need to add an entry into your SSH config file. On my Mac, I created the following:
$ cat ~/.ssh/config
Host cdsw-public
    HostName localhost
    IdentityFile ~/.ssh/id_rsa_hadoop
    User cdsw
    Port 7847
HostName is always localhost and User is always cdsw. You will get the Port number from the previous step.
Now for setting up VS Code. At a minimum you need to install the Remote SSH extension. I find the Remote SSH - Edit useful for adding different servers to my ssh config file quickly as well. Additionally you will probably want to install the Python and R extensions to help with coding tasks.
With everything installed and ready to go, you start a remote connection to your CDSW/CML server. Start by opening the command pallet and connecting to a remote host.
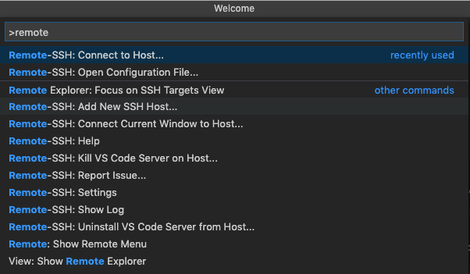
Then connect to the host you added previously.
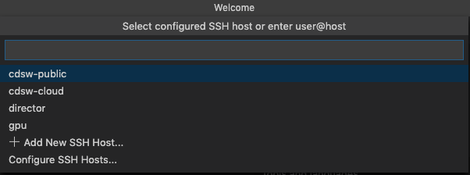 '
'For the first connection, you need to accept the fingerprint. You might not see it pop up, so pay attention to VS Code. If it's the first time your are connecting to a new session, or the port number changed, you will have to accept the fingerprint.

While VS Codes connects and sets up the remote connection, it installs some helper applications on the CDSW/CML server. Sometimes the remote session dies. Just click Retry or if it's taking a long time, restart the remote session and it will recover.
Note: If you get stuck in a loop during setup with VS Code reconnecting every 30 secs or so, the issue is with the lock file VS Code creates during the install. Close VS Code and in CML terminal, delete the /home/cdsw/.vscode-server/ directory and start again.
Once you are connected, you can then open the Explorer and view and edit the files in the /home/cdsw directory.
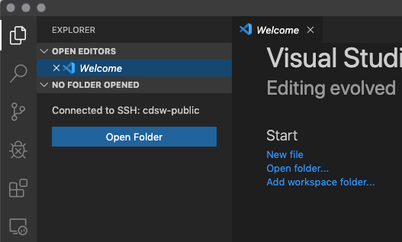
And from there you can edit any of the files on your CDSW/CML server.

This already gets you to a good place to remotely edit and modify your CDSW/CML files but VS Code has some powerful coding tools that you can take advantage of over the remote connection.
Python
To take full advantage of VS Codes python tools, you must install the Python extension into the remote ssh session. You have to install the extension the first time you connect a newly configured remote session, but it's reasonably quick.
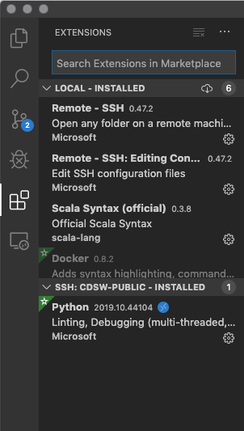
With the Extension installed, once you open your first python file, you will be prompted to install pylint Linter.

When you click Install, VS Code will open a terminal and run the code needed to install the linter. Its important to note that this is a remote terminal, running on an engine in CDSW/CML. It's the same as if you launched a terminal inside a running workbench.
If you want to run arbitrary python code inside VS Code, open a python file, select some code, right click and “Run Selection/Line in Python Terminal”. You can also just hit Shift-Enter in the code editor window.
This will open up a new terminal if there isn’t one and run the selected code. And since this is a remote session, you can run pyspark directly inside VS Code.

For more complex code requirements, you can also use the Python Debugging feature in VS Code.
R
The R extension provides similar capabilities as the python one. This means you can edit R files with code completion and execute arbitrary code in the terminal. With sparklyr, you can run spark code using R inside VS Code.

There is a trick to R though, you will have to set the path to the R binary correctly as the default might not won’t work. Check where your R binary lives in CDSW by running which R and then pasting that into the R > Rterm: Linux setting in VS Code. Its is most likely /usr/local/bin/R but its best to check.

Jupyter
The other really nice feature with VS Code is that you can work on Jupyter Notebooks within VS Code. This gives you all the great code completion, syntax highlighting and documentation hints that are part of the VS Code experience and the interactivity of a Jupyter Notebook. Any changes you make to the Notebook will be reflected on the CDSW / CML server and can be viewed online through using Jupyter Notebook as a browser based editor.

To get Jupyter working on CML is slightly tricky though. Because of the way CML uses the internal networking and port forwarding of Kubernetes ,then VS Code launches a Jupyter Server it binds to the wrong address and access is blocked. You therefore have to launch your own Jupyter Server and tell VS code to connect to that. Note that this does not apply to CDSW
The first setting you need to set is the Python > Data Science: Jupyter Server URI setting. Set this to http://127.0.0.1:8888/?token=[some-token]
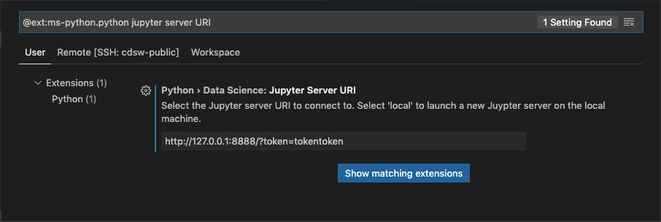
Then you need to open a terminal to launch a Jupiter Notebook server. You can launch it using: /usr/local/bin/jupyter-notebook —no-browser —ip=127.0.0.1 —NotebookApp.token=[some-token] —NotebookApp.allow_remote_access=True
This creates a Jupyter server that any new Notebooks you launch will run in.
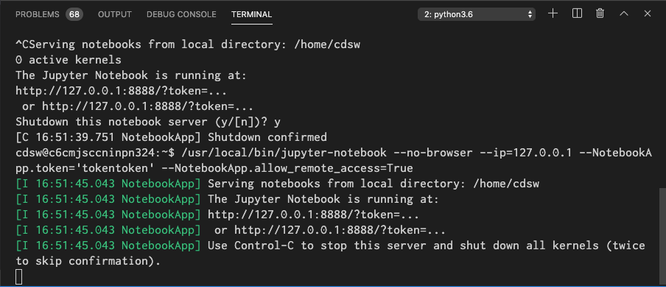
Another feature that you can use with VS Code is running a temporary Notebook for executing random code snippets. Select code you want to run, right click and click on "Run Current File in Python Interactive Window”. This is less robust though and will create loads of Untitled*.ipynb files in your home directory.

Git Integration
VS Code also has substantial Git integration. If you created your project from a git repo or a custom template, your changes and outside changes made to the repo will automatically appear.

One Final Tip
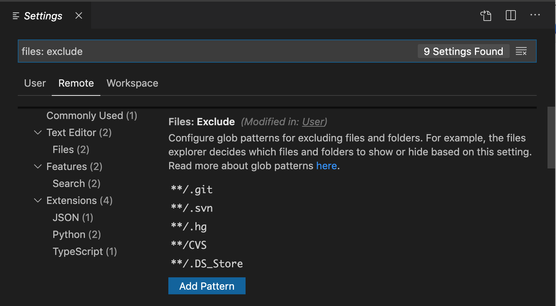
You can limit the number of files shown in the Explorer view. If you end up with loads of .[something] directories, in /home/cdsw, it can be hard to navigate. If you add the **/.* pattern to the Files: Exclude setting, it will hide all those files and directories for you.
12,034 Views

