Our Community is getting an upgrade! To get everything ready for the relaunch, we’ll be placing the site in read-only mode starting September 21st.
We really appreciate your understanding while we get things set up behind the scenes. Catch up on all the exciting details about the move here.
Need help or have questions? Drop us a line at [email protected]

Community Articles

Find and share helpful community-sourced technical articles.
Announcements
Share your experience with Cloudera on G2 and get a $25 Amazon Gift card.
Hi, I'm CLEO! Something exciting is coming to the Community. Stay Tuned!
avatar
Expert Contributor

Goal : Use CLI to create / import a dataflow in CDF-PC

Then, run Teraform to create/import Dataflow into CDF-PC.

Process :

  1.  Install CDP CLI (I am using MacOS, so I install cdpcli in this way. 
    pip3 install cdpcli
    Then confirm it's installed correctly
    [zzeng@zeng-mbp ~]$ ll ~/Library/Python/3.9/bin/ | grep cdp
    -rwxr-xr-x@ 1 zzeng  staff   250 Mar  4 12:22 cdp
    -rwxr-xr-x@ 1 zzeng  staff   250 Mar  4 12:22 cdp_completer
    [zzeng@zeng-mbp ~]$ export PATH="$HOME/Library/Python/3.9/bin:$PATH"
    [zzeng@zeng-mbp ~]$ cdp --version
    0.9.107
    [zzeng@zeng-mbp ~]$
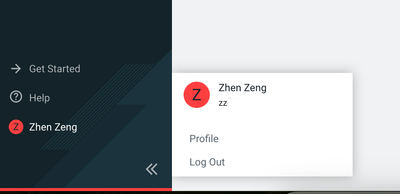
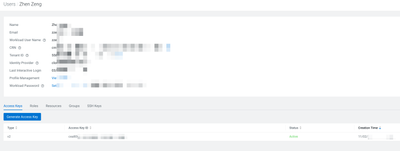
  2. Configure CLI: (Reference Link) from [Management Console] ->[User] -> [Profile]zzeng_0-1709615399576.pngzzeng_1-1709615459344.png
  3. Then I can find your API key here. If it does not exist, create one.
  4. Then, configure the API key in my MacOS (Reference):
    cdp configure
  5. After this config,  check the latest status:
    [zzeng@zeng-mbp ~]$ cdp iam get-user
    {
        "user": {
            "userId": *****
            "status": "ACTIVE",
            "workloadPasswordDetails": {
                "isPasswordSet": true
            }
        }
    }
  6. Use CLI to create dataflow:
    cdp df import-flow-definition \
      --name "zzeng2-fetch_from_S3_folder" \
      --file "/<<PATH_TO_UPDATE>>/fetch_from_S3_folder.json" \
      --comments "Initial Version"

    Example:
    $ cdp df import-flow-definition   --name "zzeng-fetch_from_S3_folder"   --description "Description for this flow"   --file "/Users/zzeng/Library/CloudStorage/OneDrive-Personal/38_CLDR_Docs/50_demo/FetchFromS3Folder/fetch_from_S3_folder.json"   --comments "Initial Version"
    {
        "crn": "crn:cdp:df:us-west-1:******:flow:zzeng-fetch_from_S3_folder",
        "name": "zzeng-fetch_from_S3_folder",
        "versionCount": 1,
        "createdTimestamp": 1709632435790,
        "description": "Description for this flow",
        "modifiedTimestamp": 1709632435790,
        "versions": [
            {
                "crn": "crn:cdp:df:us-west-1:******:flow:zzeng-fetch_from_S3_folder/v.1",
                "bucketIdentifier": "https://s3.us-west-2.amazonaws.com/*****.cloudera.com/******",
                "author": "Zhen Zeng",
                "version": 1,
                "timestamp": 1709632435792,
                "deploymentCount": 0,
                "comments": "Initial Version",
                "draftCount": 0,
                "tags": []
            }
        ]
    }
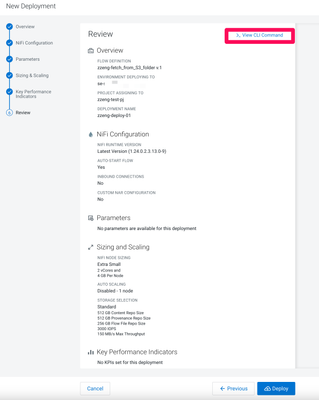
  7. Deploy the flow to an environment:
    zzeng_0-1709633118909.png
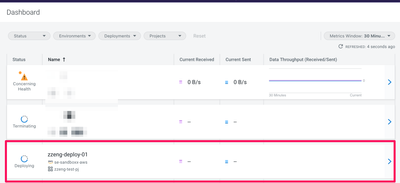
  8. We can use a wizard to do this or use the wizard to generate the command.


Result:


$ cdp df create-deployment \
>   --service-crn crn:cdp:df:us-west-1:******:service:***** \
>   --flow-version-crn "crn:cdp:df:us-west-1:*****:flow:zzeng-fetch_from_S3_folder/v.1" \
>   --deployment-name "zzeng-deploy-01" \
>   --project-crn "crn:cdp:df:us-west-1:****:project:*****" \
>   --cfm-nifi-version 1.24.0.2.3.13.0-9 \
>   --auto-start-flow \
>   --cluster-size-name EXTRA_SMALL \
>   --static-node-count 1 \
>   --no-auto-scaling-enabled
{
    "deploymentCrn": "crn:cdp:df:us-west-1:******:deployment:*****/*****"
}


zzeng_1-1709633281517.png

Reference:

1,901 Views
0 Kudos