Our Community is getting an upgrade! To get everything ready for the relaunch, we’ll be placing the site in read-only mode starting September 21st.
We really appreciate your understanding while we get things set up behind the scenes. Catch up on all the exciting details about the move here.
Need help or have questions? Drop us a line at [email protected]

Community Articles

Find and share helpful community-sourced technical articles.
Announcements
Share your experience with Cloudera on G2 and get a $25 Amazon Gift card.
Hi, I'm CLEO! Something exciting is coming to the Community. Stay Tuned!

Labels (2)
avatar
Rising Star

Documentation referred:

https://docs.hortonworks.com/HDPDocuments/HDP2/HDP-2.3.2/bk_installing_manually_book/content/configu...

Environment Information:

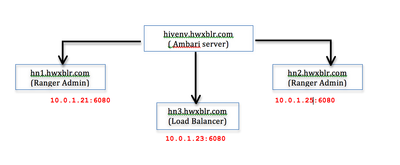
5161-screen-shot-2016-06-22-at-110108-am.png

[ hivenv ] >> Cluster name

hivenv-ambari-server.hwxblr.com >> 10.0.1.26 >> Ambari Server

hn1.hwxblr.com >> 10.0.1.21 >> Existing Ranger Admin

hn3.hwxblr.com >> 10.0.1.23 >> Load Balancer

hn2.hwxblr.com >> 10.0.1.25 >> Additional Ranger Admin

      # hadoop version
 Hadoop 2.7.1.2.3.2.0-2950
 Subversion [email protected]:hortonworks/hadoop.git -r5cc60e0003e33aa98205f18bccaeaf36cb193cc
 Compiled by jenkins on 2015-09-30T18:08Z
 Compiled with protoc 2.5.0
 From source with checksum 69a3bf8c667267c2c252a54fbbf23d
 This command was run using /usr/hdp/2.3.2.0-2950/hadoop/lib/hadoop-common-2.7.1.2.3.2.0-2950.jar
      # uname -a
 Linux hn1.hwxblr.com 3.10.0-327.13.1.el7.x86_64 #1 SMP Thu Mar 31 16:04:38 UTC 2016
x86_64 x86_64 x86_64 GNU/Linux
      # cat /etc/redhat-release
 CentOS release 6.7 (Final)

Steps to be followed:

  • Install the Ranger Admin component on the hosts you wish to use – hn1.hwxblr.com. For information about installing Ranger over Ambari, see Installing Ranger Over Ambari 2.0 .
  • Configure a load balancer to balance the loads among the various Ranger Admin instances and take note of the load balancer URL.

Step 1: Before Installing HAProxy on the server we need to install epel repository on our system depending on our operating system version using following command.

 CentOS/RHEL 5 , 32 bit:
 # rpm -Uvh 
 http://dl.fedoraproject.org/pub/epel/5/i386/epel-release-5-4.noarch.rpm
 CentOS/RHEL 5 , 64 bit:
 # rpm -Uvh 
 http://dl.fedoraproject.org/pub/epel/5/x86_64/epel-release-5-4.noarch.rpm
 CentOS/RHEL 6 , 32 bit:
 # rpm -Uvh 
 http://dl.fedoraproject.org/pub/epel/6/i386/epel-release-6-8.noarch.rpm
 CentOS/RHEL 6 , 64 bit:
 # rpm -Uvh 
 http://dl.fedoraproject.org/pub/epel/6/x86_64/epel-release-6-8.noarch.rpm

Step 2: Install HAProxy using Yum.

[root@hn3 ~]# yum install haproxy

Step 3: Now we will configure HAProxy.

[root@hn3 ~]# vi /etc/haproxy/haproxy.cfg

Please refer for brief documentation before editing this file : https://access.redhat.com/documentation/en-US/Red_Hat_Enterprise_Linux/7/html/Load_Balancer_Administ...

[root@hn3 ~]# cat haproxy.cfg
 #---------------------------------------------------------------------
 # Example configuration for a possible web
application.  See the
 # full configuration options online.
 #
 # 
http://haproxy.1wt.eu/download/1.4/doc/configuration.txt
 #
 #---------------------------------------------------------------------
 #---------------------------------------------------------------------
 # Global settings
 #---------------------------------------------------------------------
 global
   #
to have these messages end up in /var/log/haproxy.log you will
   #
need to:
   #
   #
1) configure syslog to accept network log events.  This is done
#  by adding the '-r' option to
the SYSLOGD_OPTIONS in
#  /etc/sysconfig/syslog
   #
   #
2) configure local2 events to go to the /var/log/haproxy.log
#  file. A line like the
following can be added to
#  /etc/sysconfig/syslog
   #
#  local2.*  /var/log/haproxy.log
   #
log  127.0.0.1 local2
chroot  /var/lib/haproxy
pidfile  /var/run/haproxy.pid
maxconn  4000
user  haproxy
group  haproxy
daemon
   #
turn on stats unix socket
stats socket /var/lib/haproxy/stats
 #---------------------------------------------------------------------
 # common defaults that all the 'listen' and
'backend' sections will
 # use if not designated in their block
 #---------------------------------------------------------------------
 defaults
mode  http
log  global
option   httplog
option 
dontlognull
option http-server-close
option forwardfor  except
127.0.0.0/8
option  redispatch
retries  3
timeout http-request  10s
timeout queue  1m
timeout connect  10s
timeout client  1m
timeout server  1m
timeout http-keep-alive 10s
timeout check  10s
maxconn  30000
 #---------------------------------------------------------------------
 # round robin balancing between Ranger HA
 #---------------------------------------------------------------------
 frontend 
haproxy
bind 10.0.1.28:6080
reqadd X-Forwarded-Proto:\ http
default_backend ranger_ha
 backend ranger_ha 10.0.1.28:6080
balance  roundrobin
mode http
stats enable
stats hide-version
stats uri /stats
stats realm Haproxy\ Statistics
stats auth haproxy:redhat
 option httpchk
 option httpclose
 option forwardfor
 cookie LB insert
server  hn1.hwxblr.com 10.0.1.27:6080 cookie A check
server  hn2.hwxblr.com 10.0.1.29:6080 check
[root@hn3 ~]#

Step 5: Start the HAProxy service

[root@hn3 ~]# service haproxy start

Step 6: To make the HAProxy service persist through reboots

[root@hn3 ~]# chkconfig haproxy on
  • Update the Policy Manager external URL in all Ranger Admin clients (Ranger UserSync and Ranger plug-ins) to point to the load balancer URL.

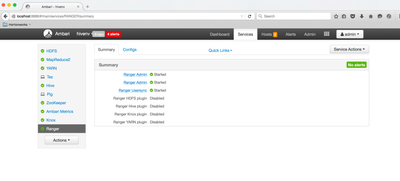
Ambari >> Ranger >> Configs >>Ranger Settings >> External URL (policymgr_external_url ) : http://hn3.hwxblr.com:6080

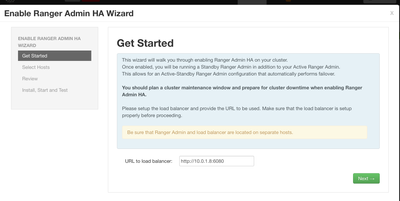
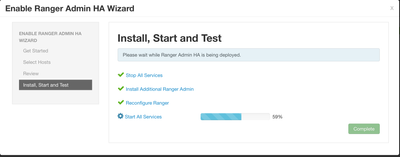
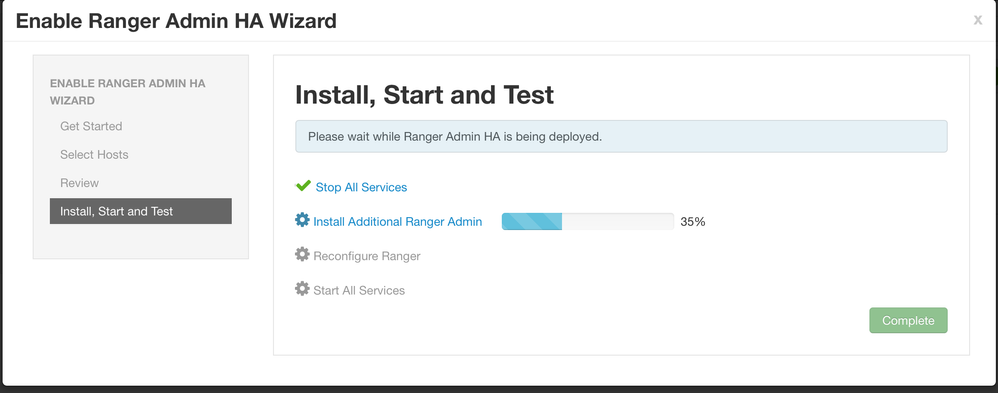
  • Enable Ranger Admin HA Wizard >> On Ambari >> Ranger >> Service Actions >> Enable Ranger HA
  • URL to load balancer: http://10.0.1.23:6080

    5162-screen-shot-2016-06-07-at-31913-pm.png

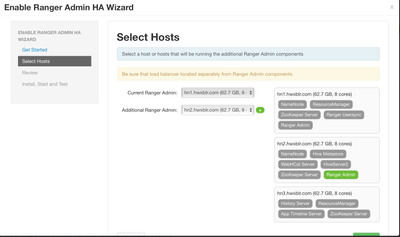
  • Select additional Ranger Admin as hn2.hwxblr.com5163-screen-shot-2016-06-07-at-31922-pm.png
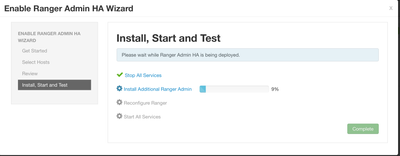
  • Install Additional Ranger Admin

    5164-screen-shot-2016-06-07-at-32049-pm.png

    5166-screen-shot-2016-06-07-at-32805-pm.png

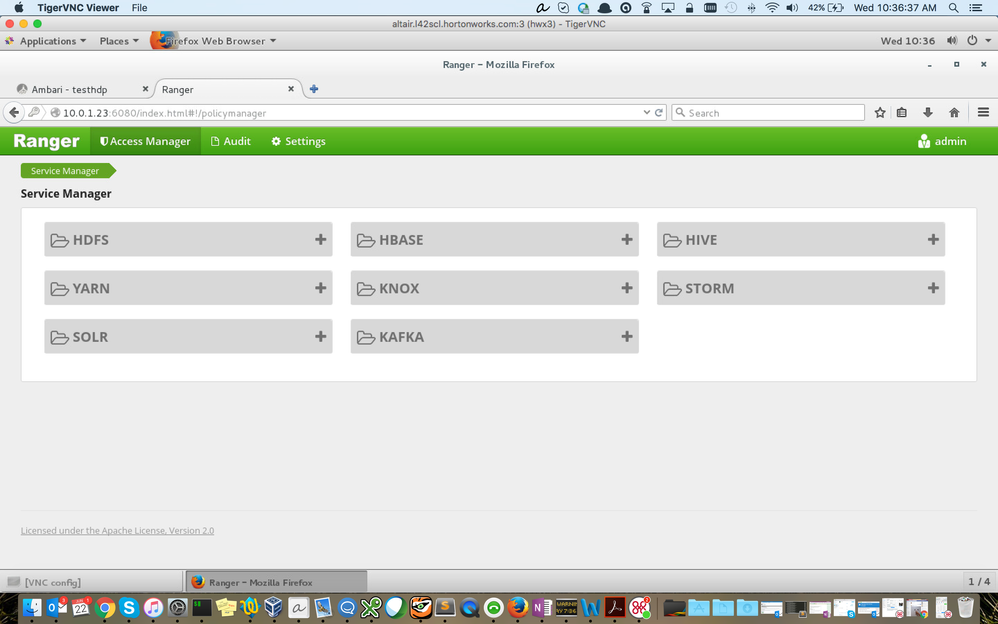
  • Access Load Balancer URL: http://10.0.1.23:6080 , you should be able to access Ranger policies.

    5168-screen-shot-2016-06-22-at-103727-am.png

    5169-screen-shot-2016-06-22-at-41751-pm.png


screen-shot-2016-06-22-at-103637-am.pngscreen-shot-2016-06-07-at-32059-pm.png
3,436 Views
Version history
Last update:
‎08-17-2019 11:53 AM
Updated by:
Contributors