Our Community is getting an upgrade! To get everything ready for the relaunch, we’ll be placing the site in read-only mode starting September 21st. We really appreciate your understanding while we get things set up behind the scenes. Catch up on all the exciting details about the move here. Need help or have questions? Drop us a line at [email protected]
Created on 03-11-202105:48 AM - edited on 04-21-202602:06 AM by GrazittiAPI
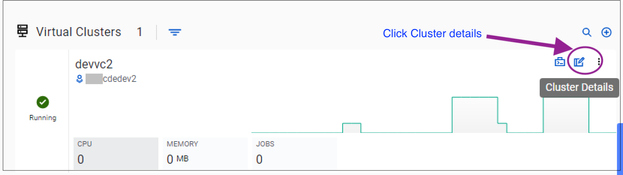
Download the Cloudera Data Engineering CLI from the Cloudera Data Engineering > CDE Services > Virtual Clusters.
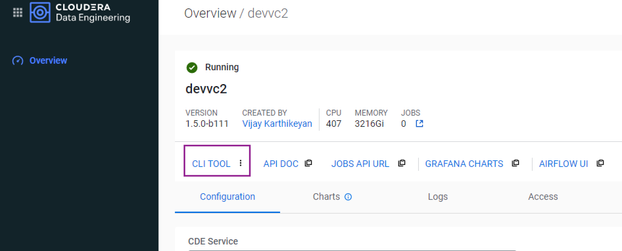
Click the Cluster details page, and click the CLI TOOL button to download the CDE CLI.
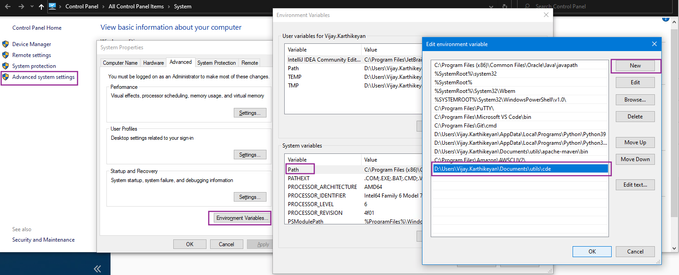
Move the CLI to the desired directory. Here, it is moved to D:\Users\Vijay.Karthikeyan\Documents\utils\cde.
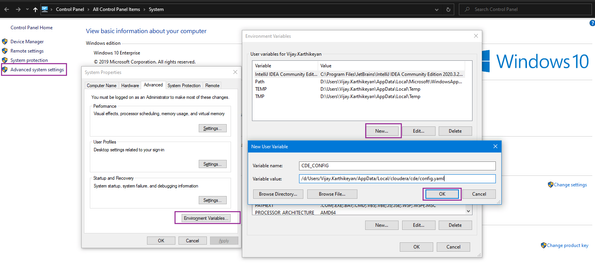
Add this directory to PATH, as shown as follows:
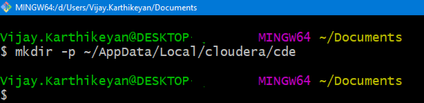
Create the directory ~/AppData/Local/cloudera/cde to store the CDE configuration files.
Make a note of your workload username from the profile page of the CDP control plane, and set workload password for the environment if not done already.
Create a file containing the workload password
Create the certificate file ca.pem holding the root certificates. Get the certificates here.
Concatenate them and save them as ~/AppData/Local/cloudera/cde/ca.pem.
Get the virtual cluster endpoint (This will be entered as the value vcluster-endpoint in the config.yaml file)
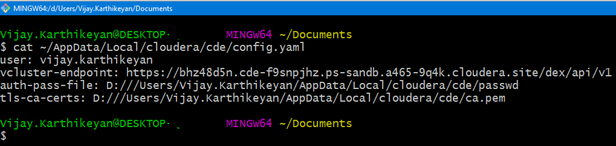
Create a file config.yaml with the following contents under ~/AppData/Local/cloudera/cde
user: <Workload username>
vcluster-endpoint: <URL copied in step 8>
auth-pass-file: <path to file created in step 6>
tls-ca-certs: <File created in step 7>
Set the environment variable CDE_CONFIG to point to the config.yaml file created in the previous step.
Now that PATH is updated and a new environment variable is set, you should relaunch Git Bash for the changes to take effect.
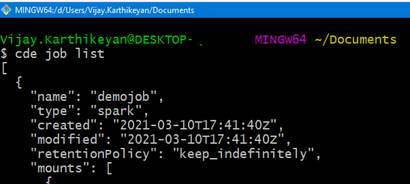
Run any CDE command to validate connectivity.
You can also submit spark-submit commands using cde spark submit.