Community Articles
- Cloudera Community
- Support
- Community Articles
- Using VS Code with CML/CDSW Runtimes
- Subscribe to RSS Feed
- Mark as New
- Mark as Read
- Bookmark
- Subscribe
- Printer Friendly Page
- Report Inappropriate Content
- Subscribe to RSS Feed
- Mark as New
- Mark as Read
- Bookmark
- Subscribe
- Printer Friendly Page
- Report Inappropriate Content
Created on
09-21-2021
06:21 AM
- edited on
09-21-2021
09:13 PM
by
subratadas
With the new runtimes feature available for both CML and CDSW, it is now possible to make better use of the remote editing capabilities with VS Code.
To use this feature you will need VS Code installed locally and a CML/ CDSW instance that supports runtimes, and has the remote editing enabled (it is enabled by default but it can be disabled in the Admin settings) and that you can reach the server from the remote point you're connecting from. If you have all of that enabled, you are good to go.
Step 1 - Configure cdswctl CLI
For the first step, you will need to have a copy of the cdswctl command line tool on your local machine. You can get the cli directly from the CML/CDSW instance by going to User Settings > Remote Editing.
The installation process is documented here and you need to get a version that works for your local OS. I'm on a Mac and I have the cdswctl cli in my /usr/local/bin directory:
% which cdswctl
/usr/local/bin/cdswctl
To connect to your CML/CDSW instance you need to know the URL for the main page, your username and your Legacy API key. The first two you should have, your Legacy API key can be found by going to User Settings > API Keys
Currently, CML/CDSW is still using the Legacy API key for remote authentication, but this will be converted to the new API Key format in an upcoming release. Make a note of the Legacy API key.
As the connection to the CML/CDSW instance is over SSH, you will need an SSH key pair on your local machine that you can use to authenticate with. If you don't have an SSH key pair, you can generate your own one. You then need to add the public key to the CML/CDSW server in User Settings > Remote Editing.
Following is an example of the public SSH key I used for this setup:
% cat ~/.ssh/id_rsa_hadoop.pub
ssh-rsa AAAAB3NzaC1yc2EAAAADAQABAAABAQDbKNjtDWoeATXCj6byhs.....
I copied that value from the terminal window and pasted it into the SSH Public Key box in the User Settings > Remote Editing page, and clicked Add.
If it's a valid key, you should see a fingerprint ID for that key in the list.
Step 2 - Connect cdswctl cli to CML/CDSW Instance
Once you have the cdswctl cli installed and your SSH key added to the CML/CDSW instance, you can create a remote connection.
The command you use to connect is:
% cdswctl login -u http(s)://[your-cml-cdsw-instance-url]/ -n [your username] -y [your-legacy-api-key]% cdswctl login -u https://ml-1651c51d-946.jf-ml-aw.a465-9q4k.cloudera.site/ -n jfletcher -y ud5r3hx3zlunjuazzvfhd5dj0y77ib2lYou have now configured the cdswctl cli to connect to CML/CDSW instance you wish to use. The next step is to set up an ssh-endpoint that creates a tunnel from your local machine to a session running on the CML/CDSW instance in the project you want to work on. However, there are new steps here as this project uses ML Runtimes and works slightly differently than the legacy engine implementation. The cdswctl cli has a requirement that you provide the runtime identifier to use to start the session. For this, you need the numerical value of the runtime you want to use to pass it in to the cdswctl cli. The cdswctl cli can provide you a list of available runtimes that you can pick from using the runtimes list option.
However when you run the command you will get a lot of hard to read JSON:
% cdswctl runtimes list
{"runtimes":[{"id":39,"imageIdentifier":"  3.6","edition":"Nvidia GPU","shortVersion":"2021.06","fullVersion":"2021.06.1-b5","maintenanceVersion":1,"description":"Python runtime with CUDA libraries provided by Cloudera"},{"id":40,"imageIdentifier":"  3.6","edition":"Standard","shortVersion":"2021.06","fullVersion":"2021.06.1-b5","maintenanceVersion":1,"description":"Standard edition JupyterLab Python runtime provided by Cloudera"},{"id":41,"imageIdentifier":"  3.7","edition":"Nvidia GPU","shortVersion":"2021.06","fullVersion":"2021.06.1-b5","maintenanceVersion":1,"description":"Python runtime with CUDA libraries provided by Cloudera"}
With 20+ runtimes by default, this becomes difficult to read. To fix this, use the jq tool. Once installed, you can pipe the output from cdswctl to jq and format and filter the results. Without any filtering, the JSON is presented in a much more readable format. For this project, let's assume we are not using GPUs so we need a Runtime that has Jupyterlab (for VS Code to use), Python 3.7 (why? because!), and the Standard Runtime version as we don't need any CUDA stuff. We can filter for this runtime using the following query in jq:
% cdswctl runtimes list | jq '.runtimes| .[] | select( .imageIdentifier | contains("docker.repository.cloudera.com/cdsw/ml-runtime-jupy
terlab-python3.7-standard" ))'
{
  "id": 42,
  "imageIdentifier": "docker.repository.cloudera.com/cdsw/ml-runtime-jupyterlab-python3.7-standard:2021.06.1-b5",
  "editor": "JupyterLab",
  "kernel": "Python 3.7",
  "edition": "Standard",
  "shortVersion": "2021.06",
  "fullVersion": "2021.06.1-b5",
  "maintenanceVersion": 1,
  "description": "Standard edition JupyterLab Python runtime provided by Cloudera"
}
The Runtime ID value we need is 42. If you don't want the additional JSON info, you can add | .id to the query to return only the Runtime ID value.
% cdswctl runtimes list | jq '.runtimes| .[] | select( .imageIdentifier | contains("docker.repository.cloudera.com/cdsw/ml-runtime-jupyterlab-python3.7-standard" )) | .id'
42
Now that you have the required info, you can create a remote ssh-endpoint connection using:
% cdswctl ssh-endpoint -p test -r 42 -c 2 -m 4
Forwarding local port 4540 to port 2222 on session tkfm59z7hbowvv9p in project jfletcher/test.
You can SSH to the session using

    ssh -p 4540 cdsw@localhost
The ssh-endpoint command takes a few options. -p test sets the project (with the incredibly creative name) to connect to. -r 42 is the runtime to use when launching the session. -c 2 -m 4 sets the number of CPU and GB of RAM for the session respectively. This is the same as when you launch a session from the Workbench directly. The default session size for remote access sessions is too small for VS Code as it installs and runs some helper files on the remote session to do useful things. If you don't have enough memory, it will kill the session.
Once this is working you can try connecting to the remote session from your local machine by running the SSH command as shown.
% ssh -p 4540 cdsw@localhost
cdsw@tkfm59z7hbowvv9p:~$
Each time you configure a new project or new CML/CDSW instance, the cli will allocate a random port number, but the port number remains the same for successive connections to that same project and CML/CDSW instance.
Step 3 - Configure VS Code
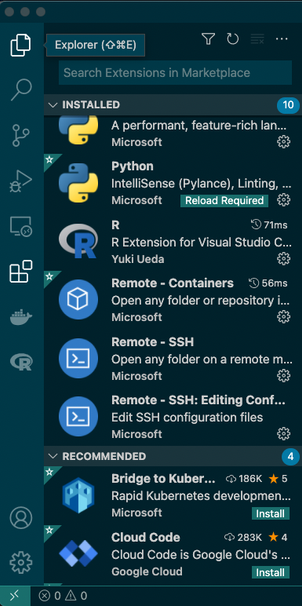
Now that you have established a remote connection, you need to configure VS Code. This process uses the Remote SSH extension for VS Code. You can find and install this in the Extensions section.
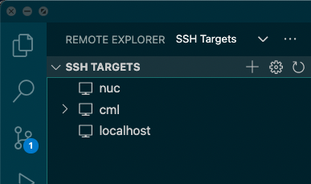
There are a couple of ways of connecting, but the easiest is to go to the new Remote SSH section and add a new target.
This will prompt you for the connection details; in this case: ssh -p 4540 cdsw@localhost
The process will ask you to add this host to your SSH config file and you will see the new SSH target available.
You can connect to this session now. There are a few ways to do this, but the easiest is just right click on the new host:
You can connect your existing window or open a new window.
Note: The first time you connect to this server, you'll be prompted to accept the server's SSH fingerprint.
You are now connected to CML/CDSW. VS Code still needs to install and run some helper services on the remote server, so you will see this running on the first connection and it takes a few minutes to complete.
Once completed, you can start editing code.
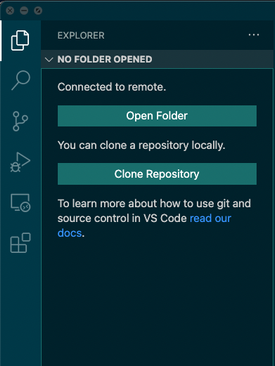
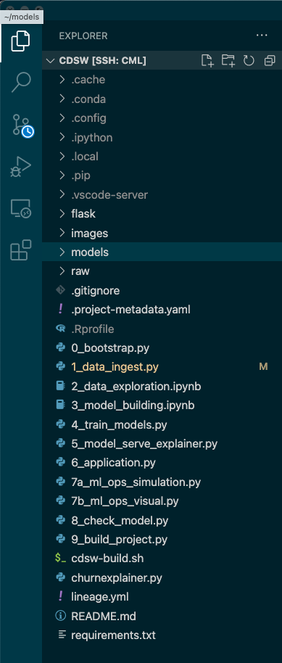
Click 'Open Folder' and navigate to /home/cdsw - this should auto-populate the path. You will now see the project files.
Step 4 - Configure VS Code Extensions
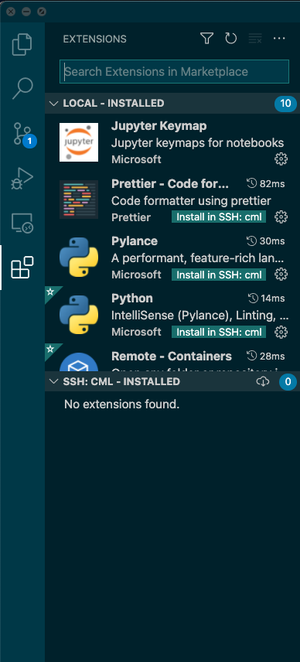
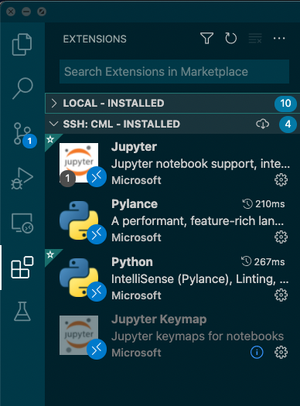
As it stands now, you can edit files and get access to the CML/CDSW terminal with the current remote connection. However, VS Code is significantly more useful if you install the language extensions. For this example, we will install the Python extensions in the remote session. If you do not have the VS Code python extensions installed in your local VS Code instance, do that first.
From there you can use the Extensions section to install the VS Code Python extension into the remote instance. VS Code includes Pylance and Jupyter extensions with the Python extension.
From here you are good to go for editing Python files and notebooks with all of VS Code's Python coding capabilities.
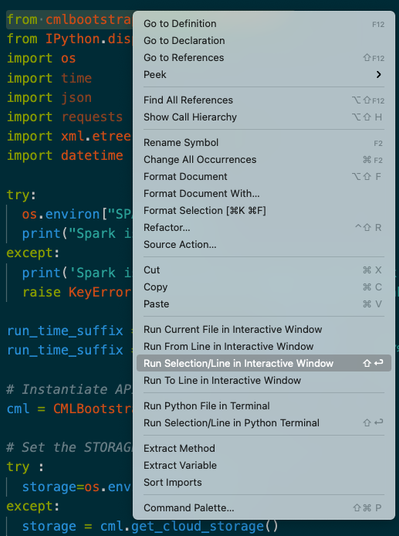
There is one last useful feature that I use a lot and that is the ability to run code selections in an interactive window. It's like a temporary Jupyter notebook and behaves more like the CML/CDSW workbench than a normal Jupyter notebook. To start the process, select some code and either hit Shift + Enter (that is on a Mac, but I think it's the same for Windows/Linux), or right-click and select - Run Selection / Line in Interactive Window.
This will start the temporary Jupyter session. The first time you do this or open a Jupyter Notebook for the first time, you will be prompted for the Jupyter connection method. Use the Default.
From there you will have access to a Jupyter like session and that you can interact with from a normal Python file.


