Created on
02-09-2019
05:59 PM
- edited on
04-21-2026
04:38 AM
by
GrazittiAPI
Series: Integration of Apache NiFi and Cloudera Data Science Workbench
Part 2: Using Cloudera Data Science Workbench with Apache NiFi and Apache MXNet for GluonCV YOLO Workloads
104446-yolocdsw.jpg
Summary
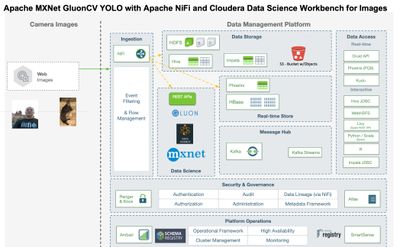
Now that we have shown it's easy to do standard NLP, next up is Deep Learning. As you can see NLP, Machine Learning, Deep Learning and more are all in our reach for building your own AI as a Service using tools from Cloudera. These can run in public or private clouds as scale. Now you can run and integrate machine learning services, computer vision APIs and anything you have created in house with your own Data Scientists or with the help of Cloudera Fast Forward Labs (https://www.cloudera.com/products/fast-forward-labs-research.html).
The YOLO pretrained model will download the image to /tmp from the URL to process it. The Python 3 script will also download the GLUONCV model for YOLO3 as well.
Using Pre-trained Model:
yolo3_darknet53_voc
Image Sources
https://github.com/tspannhw/images and/or https://picsum.photos/400/600
Example Input
{ "url": "https://raw.githubusercontent.com/tspannhw/images/master/89389-nifimountains.jpg" }
Sample Call to Our REST Service
curl -H "Content-Type: application/json" -X POST http://myurliscoolerthanyours.com/api/altus-ds-1/models/call-model -d '{"accessKey":"longkeyandstuff","request":{"url":"https://raw.githubusercontent.com/tspannhw/images/master/89389-nifimountains.jpg"}}'
Sample JSON Result Set
{"class1": "cat", "pct1": "98.15670800000001", "host": "gluoncv-apache-mxnet-29-49-67dfdf4c86-vcpvr", "shape": "(1, 3, 566, 512)", "end": "1549671127.877511", "te": "10.178656578063965", "systemtime": "02/09/2019 00:12:07", "cpu": 17.0, "memory": 12.8}
Example Deployment
Model Resources
Replicas 1
Total CPU 1 vCPUs <-- An extra vCPU wouldn't hurt.
Total Memory 8.00 GiB <-- Make sure you have enough RAM.
I recommend for Deep Learning models to use more vCPUs and more memory as you will be manipulating images and large tensors. I also recommend more replicas for production use cases. You can have up to 9. https://www.cloudera.com/documentation/data-science-workbench/latest/topics/cdsw_models.html. I like the idea of 3, 5 or 7 replicas.
How-To
Step 1: Let's Clean Up and Test Some Python 3 Code
104470-callinggluonsession.png
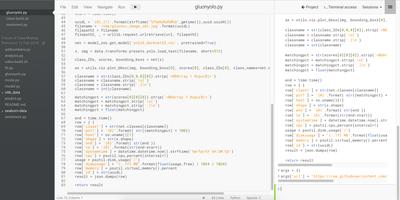
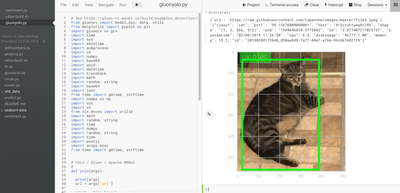
So first I take an existing example Python3 GluonCV Apache MXNet YOLO code that I already have. As you can see it uses a pretrained model from Apache MXNet's rich model zoo. This started here: https://github.com/tspannhw/nifi-gluoncv-yolo3 I paired down the libraries as I used an interactive Python 3 session to test and refine my code. As before, I set a variable to pass in my data, this time a URL pointing to an image.
104459-cdswyolotimsession.png
104460-yolotim.png
104463-cdswsessionrun.png
104462-cdswyolocat.png
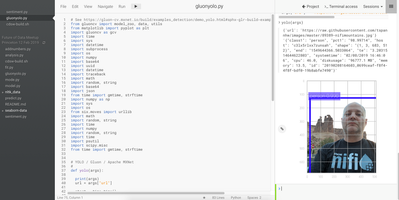
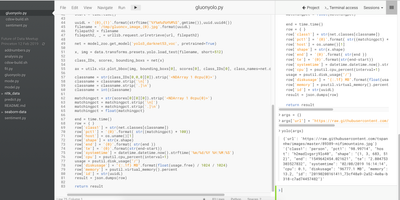
As you can see in my interactive session I can run my yolo function and get results. I had a library in there to display the annotated image while I was testing. I took this code off to save time, memory and reduce libraries. This was needed while testing though. The model seems to be working it identified me as a person and my cat as a cat.
Step 2: Create, Build and Deploy a Model
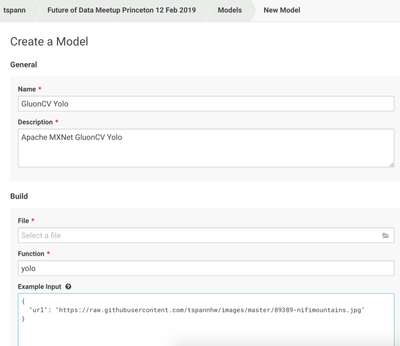
104464-createyolomodel.png
104468-gluonyolomodel.png
I got to models, point to my new file and the function I used (yolo) and put in a sample Input and response.
I deploy it, then it is in the list of available models. You goes through a few steps as the docker container is deployed to K8 and all the required pips are installed during a build process.
104467-cdswlistofmodels.png
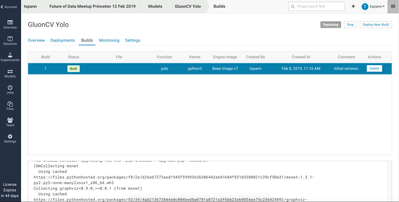
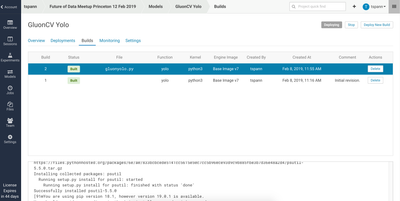
Once it is built, you can see the build(s) in the Build screen.
104469-buildinggluoncv.png
104461-cdswyolobuild.png
Step 3: Test the Model
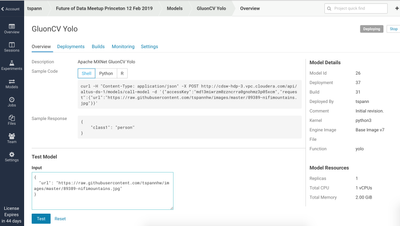
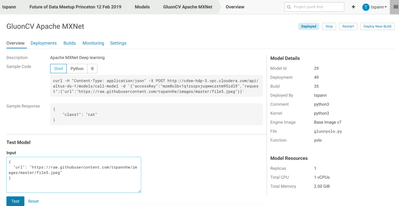
Once it is done building and marked deployed we can use the built in tester from Overview.
104450-gluonmodeltest1.png
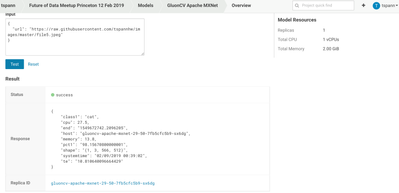
We can see the result in JSON ready to travel over an HTTP REST API.
104451-gluonmodeltest.png
Step 4: Monitor the Deployed Model
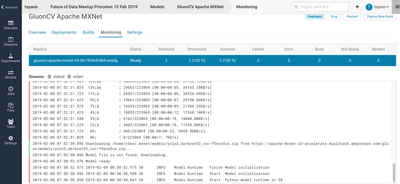
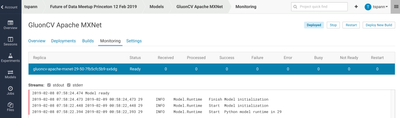
We can see the standard output and error and see how many times we are called and success.
104452-gluonmodeldownload.png
You can see it downloaded the model from the Apache MXNet zoo.
104456-gluonmonitoring.png
If you need to stop, rebuild or replace a model, it's easy.
104465-cdswlistofmodels.png
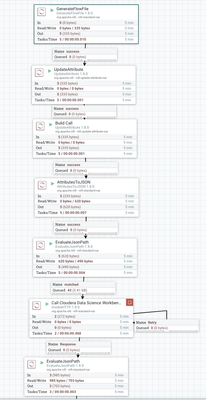
Step 5: Apache NiFi Flow
104455-gluonnififlow1.png
104476-gluonnififlow2.png
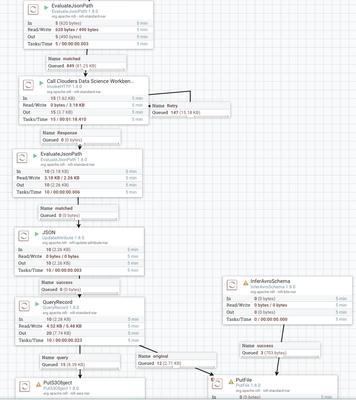
As you can see it's a few steps to run the flow. I am using GenerateFlowFile to get us started, but I could have a cron scheduler starting us or react to a Kafka/MQTT/JMS message or another trigger. I then build the JSON needed to call the REST API. Example: {"accessKey":"accesskey","request":{"url":"${url}"}}
Then we call the REST API via an HTTP Post (http://myurliscoolerthanyours.com/api/altus-ds-1/models/call-model).
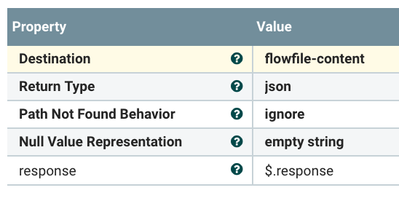
We then parse the JSON it returns to just give us the fields we want, we don't really need status.
104449-gluonparsejsonfirst.png
104453-gluonjsonextract2.png
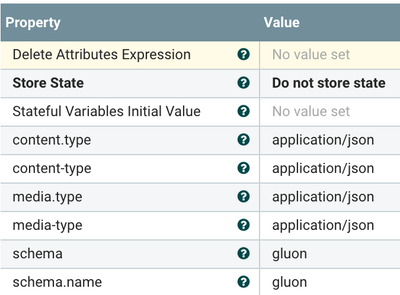
We name our schema so we can run Apache Calcite SQL queries against it.
104458-gluonschema.png
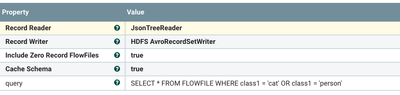
Let's only save Cats and People to our Amazon S3 bucket.
104454-gluonqueryforcats.png
At this point I can add more queries and destinations. I can store it everywhere or anywhere.
Example Output
{
"success": true,
"response":
{ "class1": "cat", "cpu": 38.3, "end": "1549672761.1262221", "host": "gluoncv-apache-mxnet-29-50-7fb5cfc5b9-sx6dg", "memory": 14.9, "pct1": "98.15670800000001", "shape": "(1, 3, 566, 512)", "systemtime": "02/09/2019 00:39:21", "te": "3.380652666091919" }}
{ "type" : "record", "name" : "gluon", "fields" : [ { "name" : "class1", "type" : ["string","null"] }, { "name" : "cpu", "type" : ["double","null"] }, { "name" : "end", "type" : ["string","null"]}, { "name" : "host", "type" : ["string","null"]}, { "name" : "memory", "type" : ["double","null"]}, { "name" : "pct1", "type" : ["string","null"] }, { "name" : "shape", "type" : ["string","null"] }, { "name" : "systemtime", "type" : ["string","null"] }, { "name" : "te", "type" : ["string","null"] } ] }
I like to allow for nulls in case we have missing data, but that is up to your Data Steward and team. If you need to add a version of the schema with a new field, you must add "null" as an option since old data won't have that if you wish to share a schema.
Source:
https://github.com/tspannhw/nifi-cdsw-gluoncv